AMOVELLE Beauty
Clean makeup brushes carry more than leftover foundation, powder, and blush. They can also hold oil, dead skin cells, and product buildup. Learning how to clean makeup brushes properly helps protect your skin and keeps each brush working as intended. Clean bristles blend makeup more evenly. They also feel softer against the face.
This guide introduces seven practical tips for a safer, more consistent cleaning routine. You will learn how to choose a gentle cleanser, control water exposure, and dry brushes without damaging their shape. Lukewarm water is usually enough for daily tools. A mild soap or brush cleanser can loosen stubborn cream products. Avoid soaking the entire brush, because water may weaken the glue inside the handle. Small details matter.
I once rinsed brushes too quickly and stored them while they were still damp. The result was a musty smell and stiff bristles. That mistake changed my routine. Now, I clean brushes in small batches, press them gently in a clean towel, and lay them flat near good airflow. Still, no method is perfect for every brush. Natural hair, synthetic fibers, and dense sponges may need different care. Check the manufacturer’s instructions when available. A professional makeup artist may clean frequently used brushes after each use, while occasional users may follow a weekly schedule. Skin sensitivity also matters, so stop using any product that causes irritation. These tips offer practical guidance, not a substitute for personalized medical advice.
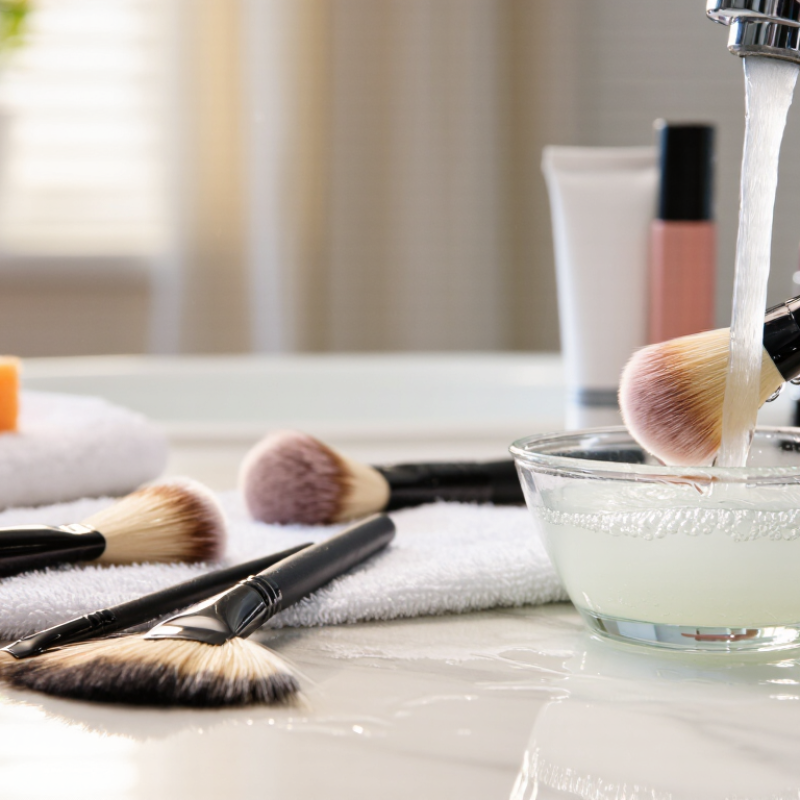
Makeup brushes collect more than leftover powder. Skin oil, dead skin cells, and moisture can cling between the bristles after each use. Over time, that buildup may affect how makeup applies and can make a brush feel stiff or uneven. A clean brush usually picks up product more predictably. Small difference, but visible.
Regular washing also helps reduce the transfer of residue from one day’s makeup to the next. This matters especially for brushes used around the eyes or on areas prone to irritation. It does not guarantee that skin problems will disappear, since many factors affect skin. Still, clean tools are a sensible part of a careful routine. I used to rinse brushes quickly and assume they were clean; the bristles looked fine, but the water often said otherwise.
Wash brushes used with liquid or cream products more often than those used only for dry powder. Use lukewarm water and a mild cleanser, keeping the handle and ferrule as dry as possible. Gently work the bristles in your palm until the rinse water runs clear. Then reshape the brush and let it dry flat, with the bristles extending beyond the edge of a counter. Patience helps. Damp brushes stored upright can hold moisture near the handle, and that may loosen the glue over time. A missed wash now and then happens; making cleaning part of a regular routine is more realistic than aiming for perfection.
Before cleaning, set out a clean towel, a small bowl, and a gentle, fragrance-free soap or brush cleanser. Lukewarm water is enough; hot water can loosen the glue inside the brush. Check the handle and bristles for care instructions, especially if the brush has natural fibers. Keep the bowl shallow. The metal ferrule should stay mostly dry.
Choose the method to match the brush. For everyday synthetic brushes, wet the bristles with the tips pointing down, then swirl them lightly in a drop of cleanser in your palm. Rinse until the water runs clear, without pushing water into the ferrule. For dense brushes, repeat gently rather than scrubbing hard. I used to rush this part, and a little makeup often remained near the center. That was easy to miss.
For delicate or natural-hair brushes, use less cleanser and avoid vigorous rubbing. Pat the bristles with a towel, reshape them, and lay the brush flat with its head extending beyond the counter edge. Let it dry fully before using it again. Not upright. Air needs to reach the bristles, and water should not collect near the handle. If the brush still feels slick or smells of cleanser, rinse it again.
| Tip | What You Need | How to Clean | Suggested Frequency | Drying Guidance |
|---|---|---|---|---|
| 1. Gather suitable supplies | Lukewarm water, a mild fragrance-free cleanser or brush cleanser, and a clean towel | Set out supplies before washing so brushes can be cleaned and dried without delay. | Before each cleaning session | Use the towel to gently press out excess water; do not twist the bristles. |
| 2. Choose a gentle cleanser | A mild liquid cleanser suitable for delicate fibers | Avoid very hot water and harsh household cleaners, which can damage bristles or loosen the adhesive holding the brush head. | Use whenever washing brushes | Keep cleanser and rinse water away from the ferrule, the metal section connecting the bristles to the handle. |
| 3. Wet the bristles carefully | Lukewarm running water or a clean bowl of water | Hold the brush with its bristles pointing downward and wet only the bristle area. | For every wash | Do not soak the brush or allow water to run into the handle. |
| 4. Clean according to brush type | Clean palm, textured cleaning mat, or fingertips | For dense brushes used with liquid or cream products, gently work cleanser through the bristles. For delicate or loosely packed brushes, use light strokes and minimal pressure. | For every wash | Keep the brush head directed downward during rinsing. |
| 5. Rinse until clear | Lukewarm water | Rinse the bristles while gently separating them with your fingers. Repeat washing if makeup residue remains. | For every wash | Stop rinsing when the water runs clear and no cleanser remains. |
| 6. Reshape and remove excess water | Clean, lint-free towel | Gently press the bristles in the towel, then smooth them back into their original shape. | After each wash | Lay brushes flat with the bristles extending beyond the edge of a counter, or angle them downward on a clean surface. |
| 7. Clean regularly and let brushes dry fully | Clean, ventilated drying area | Clean brushes used with liquid or cream products more often than brushes used only with powder. Wash sooner if a brush looks dirty or feels product-coated. | About weekly for frequently used complexion brushes; less often for occasional powder brushes | Allow brushes to air-dry completely before storing or using them. Avoid enclosed storage while damp. |
Makeup brushes collect foundation, powder, oil, and dead skin between their bristles. Cleaning them gently removes residue without roughening the fibers or loosening the handle. Use lukewarm water, not hot water, which can weaken glue near the ferrule.
Wet the bristles with their tips pointing down. Keep water away from the metal band and handle. Add a drop of mild, fragrance-free soap to your palm, then swirl the brush lightly. A cloudy trail of makeup may appear. Rinse until the water runs clear. Be patient; dense brushes often need another gentle wash. Don’t scrub hard. I used to press too firmly, and the bristles began to fan out.
Squeeze out excess water with a clean towel, shaping the brush head with your fingers. Lay it flat over the edge of a counter, with the bristles hanging freely. Never dry it upright while wet, because water can seep into the handle. Let it air-dry fully before using it again. This takes longer than expected. If the brush still feels slick or smells soapy, rinse it once more rather than pulling at the fibers. Some brushes shed a strand now and then, even with careful washing; watch for repeated shedding or a loose handle.
Clean makeup brushes regularly, especially brushes used with liquid products. Wet only the bristles with lukewarm water, keeping the handle and metal ferrule dry. Add a small amount of gentle soap to your palm, then swirl the brush lightly until the foam loosens makeup. Rinse with the bristles pointing downward. Keep rinsing until the water runs clear; leftover soap can irritate skin. It may take longer than expected.
Tip: For extra hygiene, use a brush-safe disinfectant according to its label. Don’t soak brushes in alcohol or harsh cleaners. They can weaken the glue that holds the bristles in place. Disinfectant does not replace washing, since it may not remove oil, pigment, and debris.
After rinsing, press the bristles gently in a clean towel. Don’t twist or tug. Reshape the brush head with your fingers, then lay the brush flat with its bristles over the edge of a counter so air can circulate. Let it dry completely before using it again. Damp bristles can encourage musty odors and may irritate sensitive skin. For brushes that feel rough after washing, a tiny amount of plain conditioner can help; rinse it out thoroughly. Use very little. Too much leaves a slippery residue.
After washing makeup brushes, press the bristles gently between a clean towel to remove excess water. Do not twist them; twisting can loosen the hairs and distort their shape. Reshape each brush with your fingers, smoothing the bristles into their usual outline. Then lay brushes flat on a dry towel, with the bristle ends extending slightly past the counter edge. This lets air reach them without letting water collect near the handle. Drying can take several hours, and dense brushes may need longer.
Tips: Keep brush heads lower than their handles while drying. Water can seep into the ferrule, the metal section that holds the bristles, and weaken the adhesive over time. Avoid standing damp brushes upright or drying them on a radiator. Heat may damage bristles, while trapped moisture can encourage an unpleasant odor. Check that the center feels dry before storing.
Once fully dry, store brushes in a clean holder with bristles facing upward, or in a breathable pouch. Leave space between them so the heads do not bend against one another. A crowded drawer is tempting, but it can flatten soft bristles. I still find that one brush sometimes dries slower than the others; give it extra time rather than putting it away damp.
Brushes collect oil, skin cells, moisture, and leftover makeup. This buildup can make bristles stiff and product application less even.
Wash brushes used with liquid or cream makeup more often than powder-only brushes. The article does not set a fixed schedule, so build a routine you can maintain.
Use lukewarm water and a mild, fragrance-free soap. Hot water may weaken glue near the metal band.
Point the tips downward, wet the bristles, and swirl them gently in soapy palm. Rinse until the water runs clear; dense brushes may need another wash.
Squeeze out extra water with a clean towel, reshape the bristles, and lay the brush flat. Let its head extend over a counter edge.
Water can seep into the handle and weaken the glue over time. Keep the handle and metal band as dry as possible.
Rinse it again rather than pulling at the bristles. Let it dry fully before using it.
An occasional loose strand can happen, even with gentle care. Repeated shedding or a loose handle deserves attention; I used to press too hard, and the bristles fanned out.
Learning how to clean makeup brushes properly helps remove leftover cosmetics, oil, and dirt that can build up between uses. Regular cleaning supports a more hygienic makeup routine and helps brushes perform well for longer. Start by gathering a gentle cleanser, clean water, and a soft towel, then choose a method suited to the brush’s material and level of buildup. Wet only the bristles, keeping water away from the handle and ferrule, and gently work out residue without pulling or roughening the fibers.
Rinse the bristles until the water runs clear, then use a suitable disinfecting step and, when appropriate, a conditioning rinse to keep them soft. Carefully squeeze out excess water without twisting the brush. Reshape the bristles and lay each brush flat or angled downward to air-dry fully, away from direct heat. Once dry, store brushes in a clean, dry place where their bristles will not be crushed or misshapen.
