 AMOVELLE Beauty
AMOVELLE Beauty
AMOVELLE Beauty
In 2026, polished makeup depends less on product quantity and more on controlled blending. Consumers are also becoming more educated about application tools. Circana’s 2024 U.S. Prestige Beauty Industry Sales report recorded an 8% rise in prestige beauty sales, reaching $33.9 billion. Makeup grew 5% in that channel. This growth suggests stronger demand for refined, repeatable results, not merely more color. However, sales data cannot prove that every brush technique works. That distinction matters.
This guide explains how to improve makeup blending with brushes through pressure, bristle density, product placement, and deliberate movement. Professional artists often start with thin layers and clean, dry tools. The American Academy of Dermatology recommends washing makeup brushes every seven to ten days. That advice matters when residue, oil, and microorganisms may irritate sensitive skin. I have learned that “buffing harder” usually creates patchiness. A softer hand works better. Sometimes, I still overblend cream blush and lose its shape.
The approach combines practical experience, ingredient awareness, and published market evidence. McKinsey’s The State of Fashion: Beauty report projects that the global beauty market could approach $590 billion by 2030. Its analysis highlights premium products and more informed consumers. Yet, market growth does not make every viral technique reliable. Therefore, each section will test practical choices against finish, skin comfort, and brush hygiene. Expect close-up details, from loading a tapered brush with minimal foundation to softening a harsh cheek edge. Small changes matter. The goal is not flawless performance every time. It is better control, clearer reasoning, and techniques that remain useful beyond seasonal trends.
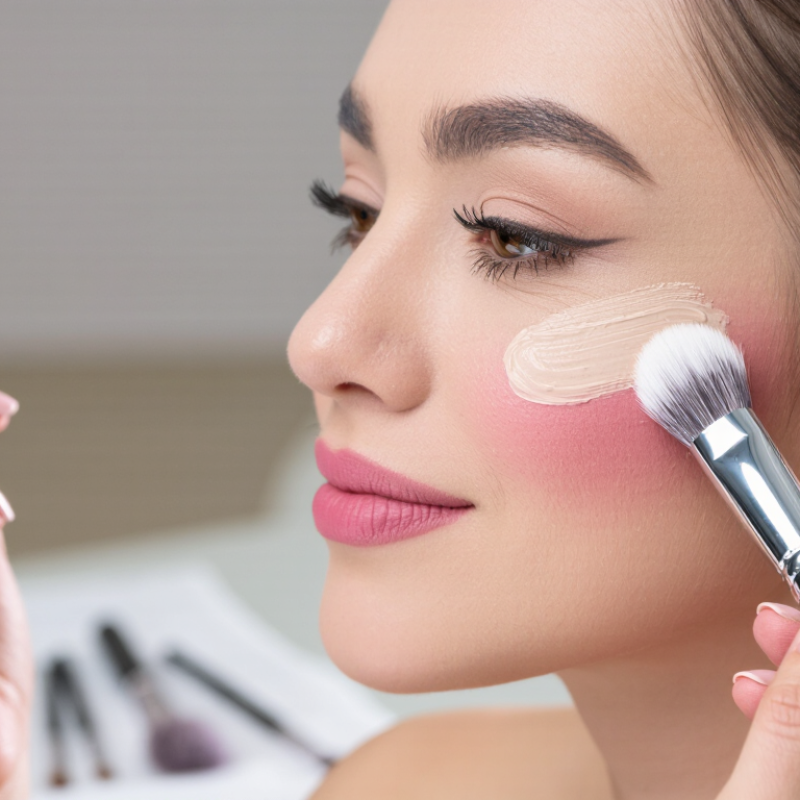
Improving makeup blending in 2026 starts with matching the brush to the product, not collecting more tools. In daily practice, liquid foundation blends most evenly with a dense, softly rounded brush. Its compact fibers spread thin layers without leaving obvious streaks. Work from the center of the face outward, using short presses around the nose. Heavy circular buffing can disturb skincare underneath. I still make that mistake when I rush.
Cream concealer needs a smaller synthetic brush with flexible edges. The narrow shape reaches beside the nostrils and under the inner eye without dragging delicate skin. Tap the product into place, then soften only the border. A fluffy brush can work for powder concealer, but it may erase too much coverage. For loose or pressed powder, choose a soft, tapered brush and remove excess before touching the face. This pause prevents a dry, thick finish.
Powder blush and bronzer need airy brushes that allow gradual color. Use a medium angled brush for cheek structure, then soften the edges with a clean, fluffy brush. Cream blush usually looks fresher with fingertips or a short stippling brush. Wash synthetic face brushes weekly, and clean eye brushes more often when switching shades. Damp fibers change pressure and payoff, so let them dry fully overnight. Brush choice matters, but lighting matters too. I sometimes blend under warm light and discover harsh edges outdoors.
| Makeup Product | Recommended Brush Shape | Useful Bristle Characteristics | Best Blending Motion | Suggested Product Load | Key Technique | Common Mistake to Avoid |
|---|---|---|---|---|---|---|
| Liquid Foundation | Medium-density flat-top or rounded buffing brush | Flexible, closely packed bristles that distribute liquid evenly without dragging the skin | Press and stipple first, then use small circular motions | 1–2 pumps for the whole face | Apply a thin layer from the center of the face outward; build coverage only where needed | Using long, forceful strokes, which can create streaks and move the product unevenly |
| Cream Foundation | Dense rounded buffing brush or short oval brush | Firm but springy bristles that can pick up thicker formulas and soften edges | Short tapping and buffing motions | A pea-sized amount per face section | Warm the product lightly on the back of the hand and blend in small sections | Applying a thick layer at once, which may emphasize texture and crease around the nose |
| Concealer | Small tapered synthetic brush | Soft, precise bristles with enough flexibility for the under-eye area and corners of the nose | Tap to place; feather the perimeter with minimal pressure | 1–3 small dots per area | Keep the highest coverage at discoloration and blend only the outer edges | Wiping back and forth, which removes coverage instead of blending it |
| Cream Blush | Small angled stippling brush or duo-fiber cheek brush | Lightly layered bristles that diffuse pigment without depositing a hard stripe | Tap, then use upward circular motions toward the temples | A small dot or half-pump per cheek | Place color on the upper apples of the cheeks and soften the lower edge | Starting with too much pigment directly on the center of the cheek |
| Cream Bronzer | Medium angled face brush or rounded kabuki brush | Medium-density bristles that maintain control around the hairline and cheek hollows | Press, sweep upward, and buff in small circles | A thin stripe or one small dip per side | Use a lighter hand near the center of the face and blend toward the hairline | Dragging a concentrated stripe downward, which can make the face look muddy |
| Loose or Pressed Powder | Large tapered fluffy brush for setting; dense rounded brush for coverage | Soft natural or synthetic fibers with enough surface area for even distribution | Press for setting; sweep lightly to remove excess | A light veil, not a fully loaded brush | Press powder onto areas that crease or become oily, then dust away visible excess | Using vigorous sweeping over unset liquid or cream makeup |
| Powder Blush | Medium-sized angled or softly rounded blush brush | Fluffy, tapered bristles that diffuse color gradually | Tap off excess, then sweep upward and outward | One light dip per cheek | Layer gradually and keep the brush moving beyond the strongest pigment | Skipping the tap-off step, which can cause a concentrated patch of color |
| Powder Bronzer | Large rounded or angled fluffy brush | Loosely packed bristles for a sheer, buildable deposit | Broad circular or soft sweeping motions | One light dip for each side of the face | Apply where the sun naturally reaches: forehead perimeter, cheekbones, and jawline | Using a small dense brush over a large area, which may leave visible edges |
| Highlighter | Small tapered fan, oval, or pencil brush | Soft, flexible fibers that place shine precisely without spreading it too widely | Lightly sweep or tap along high points | One small dip per highlight area | Apply to the tops of the cheekbones, bridge of the nose, or brow bone with controlled pressure | Applying directly over wet cream products with a stiff brush, which may disturb the base |
| Eyeshadow Base or Cream Shadow | Flat synthetic shader brush or small rounded blending brush | Synthetic fibers are practical for creamy textures because they are smooth and easy to clean | Pat onto the lid, then soften the crease edge | A thin, even layer | Blend the edges before the cream formula sets, working one eye at a time | Using a fluffy brush to spread too much product across the crease |
| Powder Eyeshadow | Flat shader for placement; tapered crease brush for blending | Flat bristles pick up pigment; tapered fluffy bristles diffuse transitions | Pat to deposit, then use small windshield-wiper or circular motions | Build from one light dip at a time | Use separate brushes for placing intense color and blending the edges | Blending with a brush overloaded with pigment, which can enlarge the color area |
| Gel or Cream Eyeliner | Fine angled or pointed detail brush | Firm, controlled bristles that maintain a sharp line | Short connected strokes; soften immediately if a diffused effect is desired | A minimal amount on the brush tip | Work from the outer corner inward and keep the product close to the lash line | Using a large fluffy brush, which reduces precision and spreads the formula unevenly |
| Lip Color | Flat, narrow lip brush with a defined edge | Firm synthetic bristles for accurate edges and controlled layering | Outline first, then fill from the corners toward the center | A thin layer, built as needed | Blot between layers to improve comfort and reduce movement into fine lines | Overloading the brush, which can create uneven edges and excess product |
Place a small amount on the back of your hand. Load only the brush’s outer bristles. Press product onto the face center, then use short strokes outward. Use less.
A dense, rounded brush suits the nose and cheeks. A tapered brush reaches inner corners more precisely. A fluffy brush creates softer fades along the cheeks and hairline.
Use a small, clean, rounded brush almost sideways. Apply light pressure and make short circular motions. Keep the center covered while softening only the surrounding edge.
Place most color high on the cheek. Sweep gently toward the hairline. Near the jaw, use downward strokes toward the neck. The transition should look gradual, not erased.
Do not add more pigment immediately. Use a clean, dry brush first. Test the pressure on your hand, then soften the line with small movements.
Uneven pressure may be the real problem. Heavy pressure can move makeup instead of blending it. I sometimes add more product too quickly. That usually makes the patch heavier.
Blend one section at a time. Let the first layer settle briefly before checking it. Stop when the edge looks soft. Overworking can remove base makeup and create a dull patch.
Check the finish in natural daylight, because warm bathroom light can hide uneven edges. Wash brushes regularly, especially after irritated skin contact. Let them dry fully. Still learning.
Learning how to improve makeup blending with brushes starts with choosing the right tool for each product and finish. Use soft, flexible brushes for powder, dense brushes for cream products, and smaller, precise brushes for areas that need extra control. Before applying makeup, make sure brushes are clean and slightly conditioned, while the skin is moisturized and prepared with a smooth base. Build coverage gradually instead of applying too much product at once, using light tapping, short circular motions, and gentle sweeping strokes to create an even finish.
Pay special attention to areas such as the cheeks, nose, forehead, under-eyes, and jawline, blending each section carefully to avoid visible edges or harsh lines. Layering thin amounts allows better control and makes corrections easier. To maintain consistent results, wash brushes regularly with a gentle cleanser, rinse them thoroughly, reshape the bristles, and let them dry completely. Store brushes in a clean, dry place with the bristles protected, helping preserve their softness, shape, and blending performance.
